Tuesday, November 26, 2013

Gingerbread Cookies

My name is Sara and I have a cookie problem.  There, I admit it.  I swear I make other things, but cookies are just so pretty!  Stop judging me. >.<


Pretty classy, eh?
A friend visiting from Italy requested that I remake a gingerbread man I had made last Christmas.   I got to decorate it with her awesome son, which resulted in a ton of fond memories and food comas.

He may look healthy, but he quickly became paraplegic after this photo.
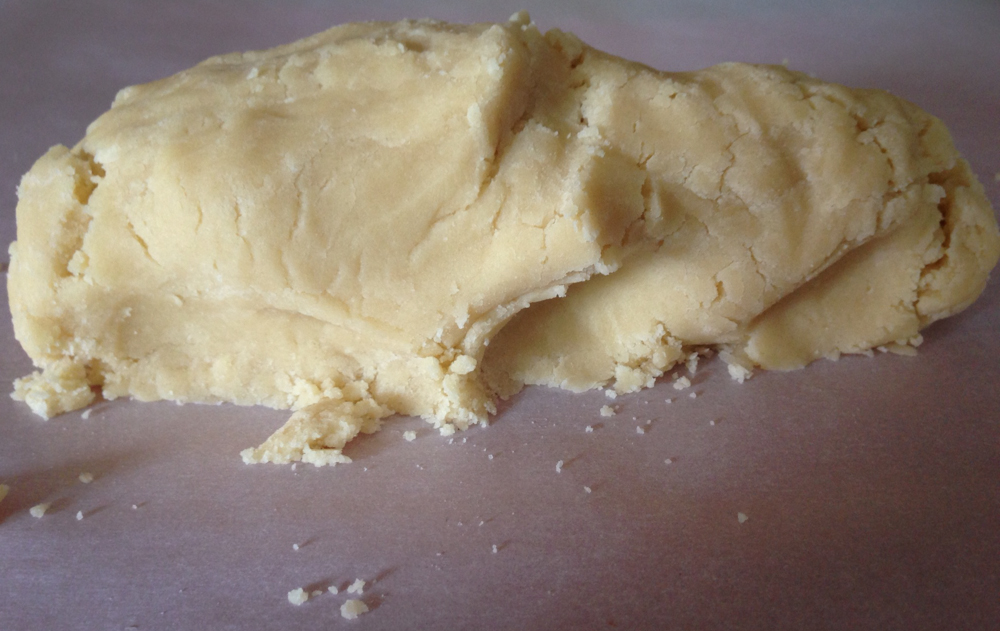
But instead, I decided to go with the fleur de lis pattern above to make my life simpler and try something new!  I couldn't find the recipe I originally used for the gingerbread man, so I settled on one that sounded reasonable online.  One key difference was that it asked me to let the dough sit for 2 hours.  Why?!  I have things to do!  I can't be all waiting and stuff!  So I decided to investigate to see if it was a truly necessary step or could be creatively skipped...

The idea behind resting the dough is so that it is easier to roll out later.  This is something I didn't have to do with the gingerbread man, since I just packed him into the mold.  Gluten strands form when you work dough, so letting it rest will make the dough a bit softer for the rolling pin.  It will also make your cookies less tough too.  Additionally, I saw many suggestions to refrigerate the dough for about 30 minutes before rolling and cutting.  The idea here is to firm up the butter to make the dough less mushy.  It will also reduce how much the cookies will expand in the oven, giving you cleaner, prettier shapes!  Fascinating!

The cookies turned out very soft and almost like a dense cake.  They were packed with ginger spicey goodness and went wonderfully with some hot tea or cold milk.  I would almost prefer more of a snap, but I think that means I have a preference for ginger snaps over gingerbread cookies, and the two are quite different in texture.

Adjustments

Nothing this time around.  I was a good girl and did as I was told!

Next Time

I would definitely decorate them with a bit of frosting next time.  Without tea, they can be a bit plain, and I am a wimp when it comes to spicy things.  A little sugar would go a long way for me.  (Yes, I did just complain that gingerbread cookies are too spicy.  ...I'm not pathetic, I'm just a super taster!)

I would also be interested to try the big gingerbread man again.  That dough was warm and mushy when I packed it into the pan, and the flavor was very different.  I've got to find that recipe!  It's also just really fun to dismember something as you eat it.

Source: http://www.food.com/recipe/the-most-wonderful-gingerbread-cookies-80156

Sunday, November 10, 2013

Molasses Ginger Snap Cookies


I thought molasses was gross for a long time.  The only thing I knew about it was that it moved really slowly during January and smelled nasty.  Then when looking for a ginger snap recipe, I found to my surprise that the recipe contained this dark brown viscous goo.  It was time to broaden my horizons!

This ginger snap cookie recipe was easy enough, but there is a lot of sifting going on.  It calls for 2 sifted cups of flour, then asks you to sift the dry ingredients together, and then sift them again into a different bowl.  So why sift so much?

Sifting can accomplish a couple things.  First, it can fluff up an ingredient you are using by breaking up all the clumps.  If a recipe calls for "sifted flour", like this one does, you want to sift before you measure your flour, because it will change the amount.  Personally, I've really taken to baking by weight lately, and a cup of sifted flour weighs 1/4 ounce less than unsifted flour.  So it really can make a difference in how tough your baked good comes out.

According to an answer on StackExchange, another reason to sift is to eliminate unwanted stuff, like chunks of bran in flour or bugs (ewww!)  This has never been an issue for me, so I don't see it as an all inspiring reason to sift.  In fact, if any of the sifting occurs after measuring, I just go to town with a whisk and my life is super easy.

Anyway, back to the cookies!!  These "ginger snaps" are not at all what I would expect compared to what is sold in grocery stores.  They are bigger, softer, and have pretty looking cracks all over the top.  (Oooo!!)  Molasses is delicious and awesome.  It's sweet, but more like a rich, soulful kind of sweet.  I don't get all sugared out eating 2 cookies.  Or 5.  Or 10.  (Stop judging me.)  The cinnamon and ginger flavors are awesome with a warm cup of tea on a crisp autumn night.  So grab your whisk and some sweatpants and get ready for a comfy night!

Adjustments / Substitutions

Nothing really.  I used a stand mixer instead of doing it by hand, but that's the only real deviation.

Next Time

Whenever a recipe says it makes 5 dozen cookies, that tends to translate to 2 dozen cookies in Sara World.  I made these cookies a bit bigger than the recipe called for, which meant that I had to play with the baking time a little bit.  I think I let the first batch go slightly too long, but they still tasted great.  In the future, I would either make the cookies smaller, or get a little bit more greedy with when I take them out of the oven.

Source: Grandma's Gingersnap Cookies

Wednesday, October 23, 2013

Oatmeal Raisin Cookies


I joked to my fiancĂ© that I kind of feel like a dog when I eat these cookies.  (I seriously missed my calling as a saleswoman, as you can tell.)  They just have that super satisfying mouth-feel that makes you want to gnaw at them slowly and savor that oatmeal flavor.

Making them was fairly standard.  Sift the dry ingredients, cream the wet ingredients, and then combine the two together.  I attempted to fold the dry ingredients into the wet to keep the cookies soft and prevent gluten strands from forming, but the dough became fairly dry.  Mixing in the oatmeal made it near impossible, so I gave up a stirred as little as I could.  The dough itself had 3 cups of oatmeal, which I thought was a huge amount.  It was slightly difficult to form the cookies into balls with the oatmeal working against you, but it was worth the effort.  It doesn't stick to your hands that much, so it's fairly easy to work with.  And after 13 minutes, you have warm, delicious oatmeal raisin cookies. =)


Adjustments / Substitutions

I only had 4/5 cup of white flour, and the recipe called for 2 cups.  I had plenty of whole wheat flour, so I looked into the substitutions.  Some websites claim that you can substitute whole wheat flour for white flour one to one.  Others claim that the substitution should be closer to 3:4 or 1:2.

Since whole wheat flour is made of the entire wheat grain (bran, germ, and endosperm), it is denser than all-purpose white flour, which is only made of the endosperm.  Therefore, if you substitute 1:1, anything you bake will be denser than if you had used white flour, which is often not desired.

A cup of white flour weighs 7 oz, so I decided to use all the white flour I did have, and then add whole wheat flour until I hit my original target of 14 oz.  Overall, I think this worked really well, and the cookies did not come out dense.

Second, I substituted shortening for the butter.  In my experience, butter makes cookies spread out thin and flat, and I wanted the oatmeal and raisins to provided the chewiness and keep the dough lighter.  I think this made the cookies taste a bit sweeter than intended.


Next Time

I would love to make this again and continue to play with the recipe.  I would like to see how it was originally intended, and if using butter would significantly impact the taste.  I further want to research how butter vs shortening affects the creaming process.  So much to learn!


Thursday, May 30, 2013

Lemon Tea Cookies


I saw a recipe on Pinterest for some lemon tea cookies with frosting on top about a week ago, and I got super excited to make them.  But after looking over some of the comments on the recipe, I saw that many people complained that the cookies fell apart after baking and crumbled into a total mess.  The recipe for the cookies contained no egg or other emulsifier, so my guess is that the dry ingredients weren't willing to stick to each other through sheer force of will.

However, I wasn't willing to give up on my lemon tea cookie urges, and I found a more promising recipe from Taste of Home.  I almost gave up making them today, because the delicious lemon frosting filling required powdered sugar, which I did not have on hand.  Luckily, the internet came to the rescue and told me I could make my own!


Turns out, powdered sugar is just mashed up sugar with some cornstarch.  For however much powdered sugar you want, just place that much granulated sugar in a blender and blend on high for however long it takes to become powder.  (These are some extremely technical directions, people.  I hope you appreciate my genius.)  And after some maniacal laughter and loud blender noises... voila!


Then, add 1-2 tablespoons of cornstarch for each cup of sugar.  The cornstarch is optional, but great for frostings where you might want to thicken a mixture for some structure.  If you don't have cornstarch, why the heck not?!  Have you seen this?  Or this?  Science demands that you have this at all times!

I mixed the powdered sugar into a mixture of butter, lemon juice, and lemon zest to make this beautiful delightfulness.

Lemony goodness...

The cookies themselves were crazy simple.  Cream together softened butter and sugar, beat in an egg yolk and vanilla, then mix in flour.  You'll get a pretty nice dough that looks like this.


Then form it into a square-shaped roll, wrap it in clear plastic wrap, and store it in the fridge for a few hours.

Be thankful I'm not majoring in architecture

The recipe said to leave the two rolls in the fridge overnight, but that would imply I have some amount of patience.  (I swear I can hear my mother laughing 3000 miles away...)  It seemed that 3-4 hours was plenty.  So after a few House of Cards episodes, I cut the very solid dough into 1/4 inch thick squares.


Then I popped them into the oven for 10 short minutes, and the rest is history!

Adjustments / Substitutions

I didn't have any oranges on hand, so instead of adding orange zest to the filling, I added lemon zest.  This made it super lemony, which I don't think is a bad thing, but I'd love to try it with the orange flavoring.

Next Time

Aside from using orange zest instead of lemon zest, there's not much else I could change.  I don't think my powdered sugar is as finely ground as store bought powdered sugar, so I don't think I would regularly make my own.  Having even a semblance of granules in the filling makes it a little bit less smooth, and I want all the texture focus to be on the cookies themselves.

Tuesday, May 21, 2013

Vanilla Frosting Fail

If you're ever having a bad day and need a good laugh, I give to you...


SLOPPERS MCCAKE!!
The cake itself turned out wonderfully.  The frosting... not so much.  After adding over 1.25lbs of confectioner's sugar to thicken it, I gave up and just slathered it on.

Maybe next time I'll choose the 4 sticks of butter buttercream frosting over 2/3 cup of Crisco.  *shudder*

UPDATE: Apparently, this recipe asked for 1 (2lbs) box of confectioner's sugar.  Not 1 (1lbs) bag.  Whoops...  It is really tasty too!!


Monday, May 20, 2013

Blueberry Muffins with Lemon Sugar


If you like crunchy, delicious tops on your muffins and a boatload of blueberry flavor, this muffin recipe rocks.  While it has a few preparation steps to handle, like making blueberry "jam" and prepping lemon sugar, it is totally worth it.  Ammmmmazing.

To make the lemon sugar coating on top, you need some lemon zest.  Zesting lemons feels sadistic if you have a tendency to anthropomorphize your fruits and veggies, so try not to think too hard about it.  After that, mix the zest in with the sugar and let it absorb all the delicious flavor.

Zesty.

After that, you make a blueberry "jam".  I put that in quotes because you don't end up adding any pectin for preservation.  To make it, you simply heat up blueberries with some sugar and mash them until they look like this.

I could fingerpaint with this stuff.  Edible art!

The batter for the muffins is fairly standard, but super delicious.  You mix in real blueberries to the batter and scoop it into your muffin tin with your trusty ice cream scoop.  I like to use a silicone muffin "tin" because the muffins just pop right out.  But there is the downside of not getting to pick out adorable muffin papers. =(


After that, you place 1 tsp of blueberry jam into the center of each muffin and swirl it around with a toothpick in a figure 8 pattern.  This adds a lot of awesome blueberry flavor, and makes the muffins a cool shade of purply/blue.


Finally, generously sprinkle on the lemon sugar.  Make sure to lick all the excess off your finger tips and skip wildly about the kitchen.


And after a very short baking time, voila!!


Adjustments / Substitutions

None this time.

Next Time

I would definitely double the recipe, since this only makes 12 muffins.  After my boyfriend and I both ate 3 muffins fresh out of the oven, they didn't stand a chance to make it to sundown.

Source: The Science of Good Cooking (ISBN: 978-1-933615-98-1)

Saturday, May 4, 2013

Pancakes


Mark Bittman, cook and renowned columnist for the NY Times, said he had no idea why people buy pancake mix instead of making it themselves.  After making these pancakes from scratch, I totally agree.  They were amazingly fluffy and simple, and they totally made my morning. =)

So here's a little pancake science.  This recipe calls for mixing 2 tbsp of white vinegar with 2/3 cup of milk.  Why?  Adding vinegar (or lemon juice) to milk is a great way to make your own delicious buttermilk!  But why doesn't that curdle the milk and make it gross?  Here's an answer from foodreference.about.com:
When adding lemon juice or vinegar to hot milk, it will curdle almost immediately, but adding it to cold milk will not produce a reaction for quite some time.
As with so many cooking things, temperature is a huge factor.  Cold slows so many reactions, which is why putting food in the fridge often stops it from breaking down as quickly.  I love science!!


It always takes me a little bit of time to figure out the right heat, but after briefly experimenting with a cast iron skillet, I find that I prefer a standard non-stick pan at medium-low heat.  If I had a griddle, I would use that in a heartbeat, but it's another item on the cookware wish list for now...

What more can I say?  Pancakes are awesome and you should eat them.

Adjustments / Substitutions

I used lactose-free milk instead of regular milk, and they tasted totally awesome.  No qualms there.

Next Time

I would just start off on a lower heat instead of a higher one, because I feel like it's much easier to just wait longer for them to cook and adjust upwards instead of burn them and go "Aw crap!  I just burnt one of my 8 precious pancakes!!"

Source: Fluffy Pancakes - kris (5 star rating with over 4500 reviews?  Yeah, they're good.)

Friday, May 3, 2013

Chicken Katsu

I really like black olives.  Don't judge me.
Chicken katsu, known as tonkatsu when prepared with pork, is a very satisfying meal and super easy to make.  As long as you have raw chicken breasts, flour, egg, panko bread crumbs, copious amounts of canola oil, and a healthy respect for hot oil, it'll be smooth sailing.  Did you know that oil doesn't actually boil?  Between roughly 160-250C (325-475F), oil will reach a smoking point and produce a blue smoke.  (Neat!!)  At this point, the oil loses its flavor and nutritional value, so when deep frying, it's good to use an oil with a high smoke point.

Anyway, to make delicious chicken katsu, put the flour, eggs, and panko into three separate dishes:

Try to make as much of a mess as possible
Using either whole chicken breasts or slices, prepare them by dipping them into the flour, then egg, then panko crumbs.  Set them aside until your oil is hot and ready, then start frying!


And then, fairly quickly, they'll come out looking like this!


But if you load too many little nuggets into the fryer at once, your stovetop might look like this:

A lesson well learned

Adjustments / Substitutions

I totally forgot to rub the cutlets in salt and pepper before giving them the flour, eggs, crumbs treatment, but the panko crumbs were flavorful enough without it.  Plus, all the yummy taste came from the delicious tonkatsu sauce.

Next Time

I would be careful not to overfill the vat of bubbling oil, because that is crazy scary.  I think I could've got away with using a bit less oil, but it's still important to make sure that the pieces of chicken are totally covered.  Finally, the tonkatsu sauce called for dijon mustard, but this made it have a little too much bite for my very wimpy taste buds.

Source:
      Chicken Katsu: www.allrecipes.com - saukraiiko
      Tonkatsu Sauce: www.seriouseats.com

Wednesday, May 1, 2013

Ziti al Forno (Baked Ziti) w/ Meatballs


Ziti al forno is a labor of love, and it is well worth the effort.  As a girl surrounded by Italian food in my home state of Rhode Island, and in the kitchen I grew up in, Peter Bocchieri's recipe brought back so many fantastic memories.  It is not a complicated dish to make, but if you're anywhere near as incompetent as me, prepare to be burned by jumping oil and crushed by falling cans of tomatoes.  (28oz is a lot of ounces on your big toe... ouch!)

The ingredients are what truly make this an incredible meal.  It calls for mozzarella, ricotta, and pecorino romano cheese; the last of which really gives the cheesy layers their flavor.  San Marzano tomatoes, which were originally grown at the base of Mt. Vesuvius, make for a sauce that my great grandmother Stella would be proud of.  Substituting out any of these ingredients would be a crime against humanity.

The preparation has three main phases: preparing the meatballs, simmering the sauce, and baking the ziti.


The meatballs are tiny; about the size of a grape.  The recipe makes about 50 little meatballs.  The edges are browned in a skillet, as well as some Italian sausage, and they are then cooked all the way through in the delicious sauce.

Can't you just smell it?
After 1.5 hours of your house smelling like some villa in Naples, you remove the meatballs from the sauce and begin creating an epic mixture of ziti, sauce, and cheese.  Creating layers in a 15"x10" casserole dish, you are oven-ready.


And voila!

Why does it have to cool for 20 minutes?!

This was a challenging dish for me.  I ended up preparing it over the course of two days, but I have no regrets.  It took almost 3 hours for me to chop up all the necessary ingredients, prepare the meatballs, and make the sauce.  Then it took another 2 hours or so to cook the pasta, arrange the casserole dish, and bake it.  This would be a great weekend project instead of my brilliant choice of "Let's start at 6:30pm on a Tuesday!"

Adjustments / Substitutions

I accidentally bought ground Italian sausage instead of linked Italian sausage, so I had to take the time to shape it before browning.  In the future, I'll definitely be buying encased sausage.

Next Time

This is my favorite dish that I've ever made, so far.  Instead of browning the meatballs in only 2tbsp of oil, I found myself adding oil to make sure they all browned.  However, the meatballs seemed a bit more oily than I would have liked before I added them to the sauce, so I might scale that back a bit in the future.

Source: Cooking Italian Comfort Food - Peter Bocchieri

Sunday, April 28, 2013

Slow Cooker Chicken Soup


During Seattle's long winters, nothing restores your will to live like a bowl of homemade chicken soup.  Slow cookers make everything amazingly easy and amazingly delicious.  This recipe is incredibly simple.


Clean a whole chicken and place it in the slow cooker.  Throw in some veggies, spices, and chicken broth, and voila!


After 4 short hours on high, the chicken will just melt right off the bone.  Careful shredding that hot chicken, though.

Adjustments/Substitutions

Instead of using dried garlic, I used fresh garlic because it was all I had on hand.  No great tragedy there!  Two of the guys I shared this dish with loved it even more once they added some Sriracha.

Next Time...

This soup is a classic, so I would be happy making it again the exact same way.  However, maybe adding some leeks in the future could be a fun twist.

Source: http://www.bakedbyrachel.com/2012/01/slow-cooker-chicken-soup/

Guest Post: Trail Mix

(In honor of the beginnings of my humble blog, my awesome friend Catherine has written a guest post! I hope you enjoy!)


Ingredients

  • Procrastination
  • Fruit
  • Nuts
  • Outdoor seating

Directions

  1. Be busy doing something awesome.
  2. A day later, finally make yourself go to the grocery story anyway because apparently you are not going to run out of awesome.
  3. Pay absolutely no attention at the grocery store. You may note you are not paying attention, but it is important that you then continue paying no attention.
  4. Wander around putting things in your basket while listening to Sara's rendition of shoving her hand  in a chicken's "neck hole" to harvest its organs. Find this sufficiently distracting to continue paying no attention.
  5. Realize after you have left the grocery store that you have bought nothing constituting a traditional dinner.
  6. Shove it in a bowl and call it trail-mix per the advice of the best Tom.
  7. Eat outside with feet up, using fingers.


Bon appétit!

Classic Brownies


Rich and flavorful, these gooey brownies are sinfully good.  (The sin being the 12 tbsp of butter that went into them.  Eek!)  The key to their fudgy consistency was being really dedicated to folding the flour into the batter instead of stirring it.  The recipe recommended folding with a rubber spatula until only a few streaks of flours were left, and this seemed to work great.

The delicious science underneath is that when you're mixing batter or dough, you are forming a gluten network.  According to The Science of Good Cooking, gluten is what gives bread its structure and chewiness, but this is a less desirable quality in brownies or quick breads (like banana bread).  By folding batter with a rubber spatula instead of stirring, you reduce much of this gluten formation and leave your brownies soft and crumbly.  Mmmm...


Another clever trick was the use of a foil sling.  By putting two foil sheets perpendicular into the pan, you can simply lift the brownies out after they've cooled.  And clean up is a snap!


"Making a Foil Sling" - America's Test Kitchen

Brilliant!

Adjustments/Substitutions

I didn't have any unsweetened chocolate on hand, or a burning desire to go to the store, so I substituted for semi-sweet chocolate chips and used 6 tbsp less sugar to compensate.  Also, I don't own a 13"x9" baking pan, so I had to use an 8"x8" pan.  This left a lot of guess work for the bake time, which ended up being close to 45 minutes instead of 30.

Next Time...

My biggest issue was using an 8"x8" pan instead of 13"x9".  This made the brownies much taller, and I thought I could simply compensate by increased baking time.  They came out of the oven looking picture perfect, but after cooling for about an hour, the center collapsed in.  I'm not sure if I should've let them bake for slightly longer, but I think just using the proper 13"x9" pan would be a much better plan in the future.

Source: The Science of Good Cooking (ISBN: 978-1-933615-98-1)